
This help page walks you through the basics of setting up a new blog for use in one of my classes. Follow the steps IN ORDER for the smoothest experience!
You can return to any of these steps as needed, but for the most part they’re one-time actions rather than part of the daily use of your blog.
Contents
- 1 OPEN THE FULL DASHBOARD
- 2 CUSTOMIZE YOUR PROFILE
- 3 ADJUST YOUR BLOG’S SETTINGS
- 4 CREATE CATEGORIES
- 5 CHOOSE A THEME
- 6 ADD WIDGETS TO SIDEBAR
- 7 CUSTOMIZE WIDGETS
- 8 DELETE UNNECESSARY POSTS & PAGES
- 9 ADJUST YOUR NOTIFICATION SETTINGS
- 10 CHANGE WHICH BLOG IS SET AS YOUR DEFAULT
- 11 ADD NEW USERS TO YOUR BLOG
- 12 STILL TO COME
OPEN THE FULL DASHBOARD
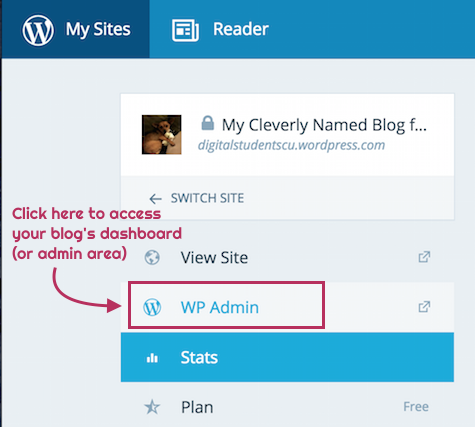
After you log into your WordPress.com account, click on the My Sites tab in the upper left corner and then click WP Admin, which will open your blog’s full dashboard (or “WordPress Admin area”).
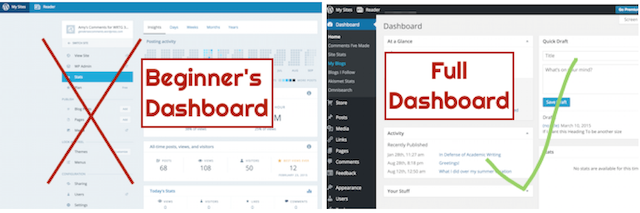
TIP: The full dashboard has a black background (unless you’ve chosen a custom color), whereas the “beginner’s dashboard” has a bright blue background. Stay out of the “beginner’s” area as it will likely only frustrate you!
See the difference?
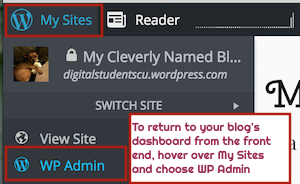
TIP: HOW TO MOVE BETWEEN DASHBOARD & FRONT END
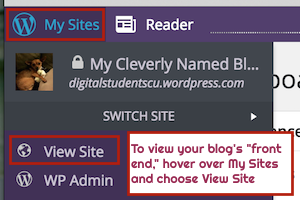
You can always view the front end of your blog (to see changes you’ve made) by clicking on “View Site” from the menu that appears when you hover over the top left corner of the Dashboard.
CUSTOMIZE YOUR PROFILE
Open the Users tab on your dashboard’s left sidebar.

Click on My Profile to upload an avatar and to add any personal details you’re willing to share on a public blog. (You do NOT need to give your real name or a photo of yourself!)
Click on Personal Settings to customize the colors of your admin interface, turn proofreader off or on, change your password, and more.
(You can always come back to these later, now that you know where they are.)
ADJUST YOUR BLOG’S SETTINGS
Open the Settings tab, which is at the bottom of the dashboard’s left sidebar.

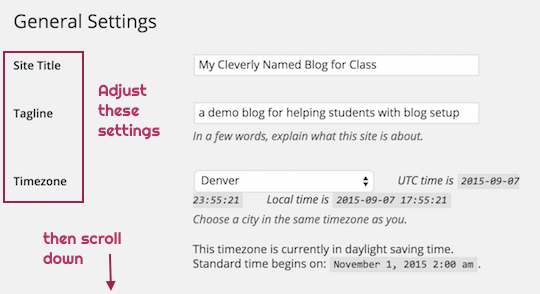
Adjust General Settings
- Give your blog a title that looks like a regular sentence, like: Perpetual Revision Syndrome (not perpetualrevisionsyndrome)
- Delete the generic “Just another WordPress site” subtitle and enter your own (or leave blank)
- Set the correct time zone (TIP: Start typing Denver and it should appear in the long drop-down list)
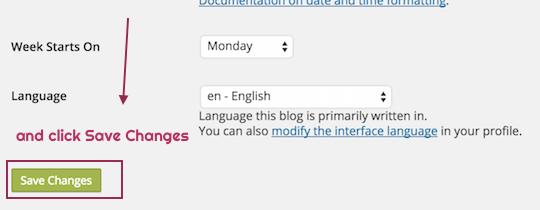
- Adjust the time and date displays, if you prefer a different format
- Then click Save Changes
Adjust Discussion Settings
These settings impact who can make comments on your posts. Restrict comments to logged in members only, using the options you see in this screenshot:
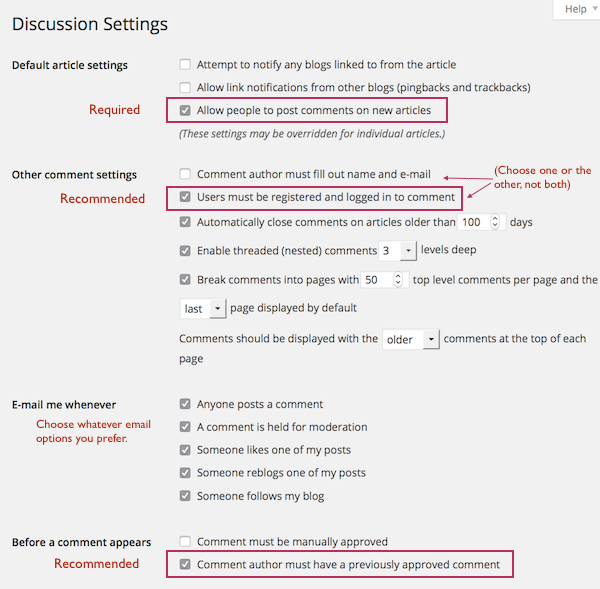
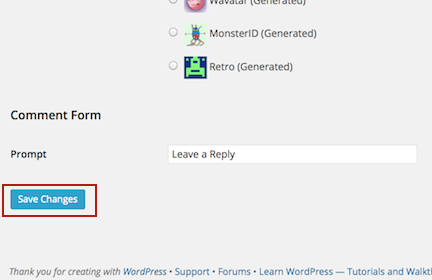
Then scroll down the page and click Save Changes.
CREATE CATEGORIES
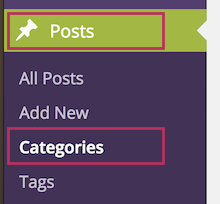
Open on the Posts tab on the left sidebar and click on Categories.
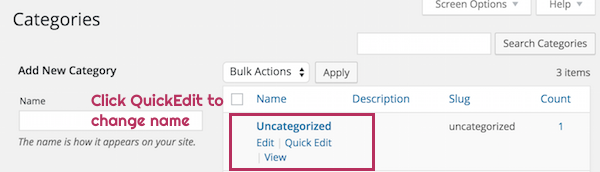
Rename the Uncategorized Category
For example, if you plan to use this category for posts that feature personal info or reflections on personal experience, you might use something like: Life & Times of __ (insert your name), Inside Perspective, True Stories, or whatever appeals to you (and will make sense to your viewers).
To rename the category, hover over it and select Quick Edit. Type the new name and press enter.
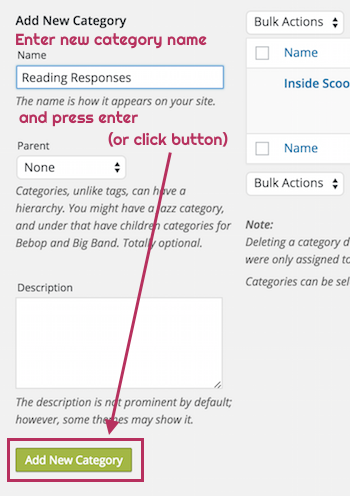
Create Custom Categories
You can always add, edit, and delete categories later, as you get a better feel for what would be most helpful to you and your readers.
CHOOSE A THEME
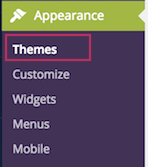
The theme controls the overall appearance of your site, including colors, fonts, and style elements. To access the themes area, click on the Appearance tab.
Browse for Free Themes with Sidebars
Be sure to sort by Free Themes:

Browse the theme thumbnails to see which ones suit your style AND display content in a sidebar.
A sidebar is a small strip along the right or left side that can contain bits of text, category lists, tag clouds, recent comments, and more. Our Class HUB has a sidebar on the left, and the site you’re viewing now has a sidebar on the right. These sidebars are persistent, meaning they’re always visible.
Here’s how you can tell at a glance if a theme includes a sidebar, although in some cases you may need to turn the sidebar option on for it display:

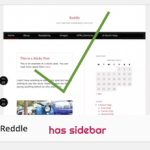
NOTE: More and more themes these days use a “responsive” design, so that the site adjusts for viewing on mobile devices. If these themes offer sidebars, they are often not visible until a user clicks on a sidebar icon. If you fall in love with a responsive theme, you may give it a try, but be aware that some of your readers may never think to click that icon to view your sidebar.
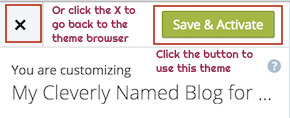
Preview Themes & Activate Your Top Choice
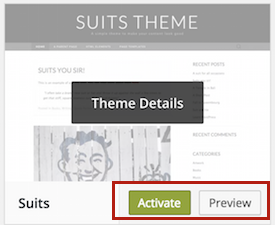
If you like the theme based on its preview, click Save & Activate. If you don’t, click the x to return to the theme browser.
Customize Your New Theme
The Customizer attempts to give you a live preview of your changes, but after you save them, take a look at the blog’s front end to make sure it looks the way you want it to. To make further adjustments, return to the full Dashboard, click on the Appearance tab, and choose Customize.
For more details on the options available, see the WordPress help page on Customization Options.
Choosing Your Own Header
Many themes give you the option of uploading your own image to serve as the blog header. To find out the ideal width and height for the image (in pixels), click on the Appearance tab on your full dashboard and then click on Header. You can also get to the Header section through the “Customizer.”
Once you know the recommended width and height, you can use those instead of the values I give in this tutorial on making headers using Pixlr, a free, web-based photo editing tool.
ADD WIDGETS TO SIDEBAR
Most themes display widget content on the left or right sidebar, but some may offer more than one sidebar. Typically you only need to use the one marked “primary widget area.”
TIP: Settle on a theme first, before you spend much time customizing your sidebar. Sometimes when you switch a new theme, your sidebar customizations get messed up, so always save a copy of any custom text you put on the sidebar.
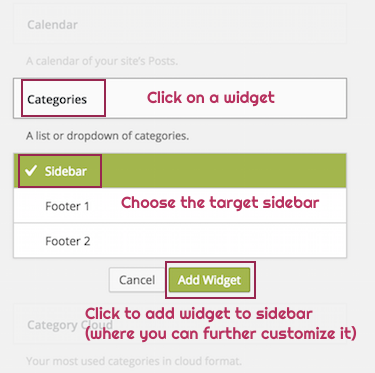
Open the Widgets page from the Appearance area in the dashboard sidebar.
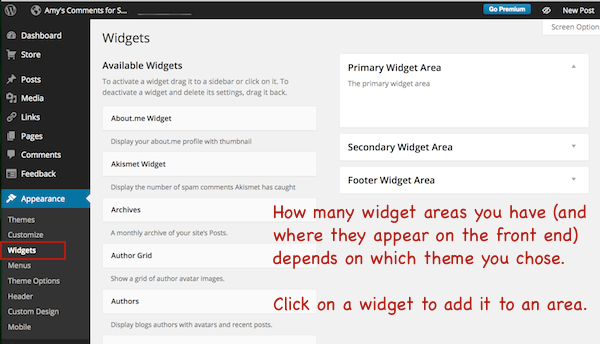
Locate the widgets you want to add, click on them, and then click Add Widget.
Required Widgets
Everyone should enable these two widgets:
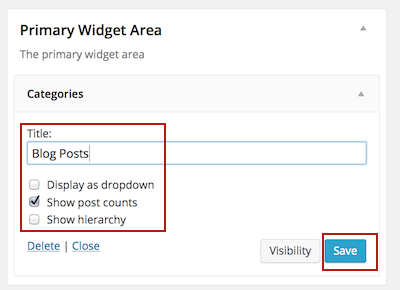
Categories
This widget enables viewers to see a list of categories you’ve used for your blog posts on the sidebar. Only categories with posts in them will show up on your blog’s front end.
We will use the category list on your sidebar to browse your posts by specific categories. I’ll also use it as a quick way of checking on your progress.
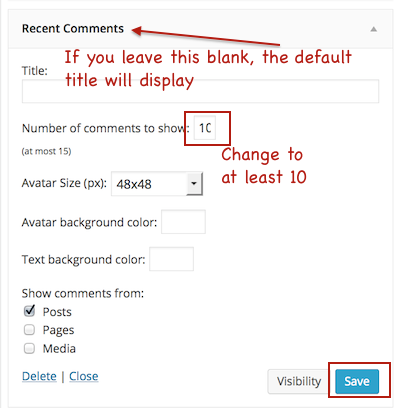
Recent Comments
This widget will display a list of recent comments on your blog posts (once you have comments). Displaying Recent Comments on your sidebar makes it easy for everyone to see what posts have recently gotten attention, so you can either join the conversation or find a different post to comment on.
Recommended Widgets
Typically bloggers assign posts to one category but give them multiple tags to reflect the topics discussed in the post. If you want to tag your posts, activate the Tag Cloud widget, which will display a “cloud” of your most often used tags, with changes in size to show frequency. (See the Tag Cloud on this site’s sidebar for an example.)
Text Box
Visitors to your blog might find an “about” blurb helpful, or you might want to add favorite quotes, thoughts for the day, or other material to the sidebar. You can do that in a Text widget.
Blogs I Follow
This widget will display links to all the blogs you follow, including your blog circle members’ blogs.
Feel free to experiment with the other widgets as well. You can always add, edit, or delete widgets later.
Rhetorical Awareness Pop Quiz
Under what conditions would a “Recent Posts” widget be helpful to viewers?
CUSTOMIZE WIDGETS
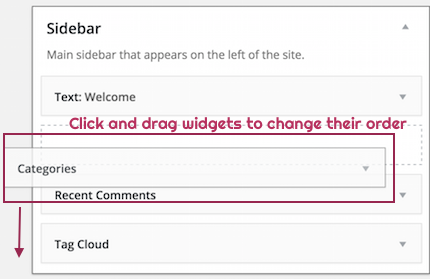
Once the widget is in your “primary sidebar” area, you can modify it as needed, as shown below.
Change Widget Settings
Customize Text Widget
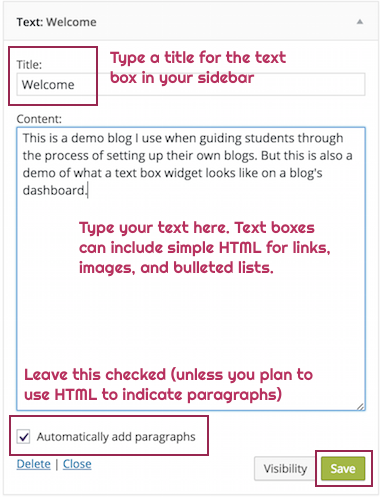
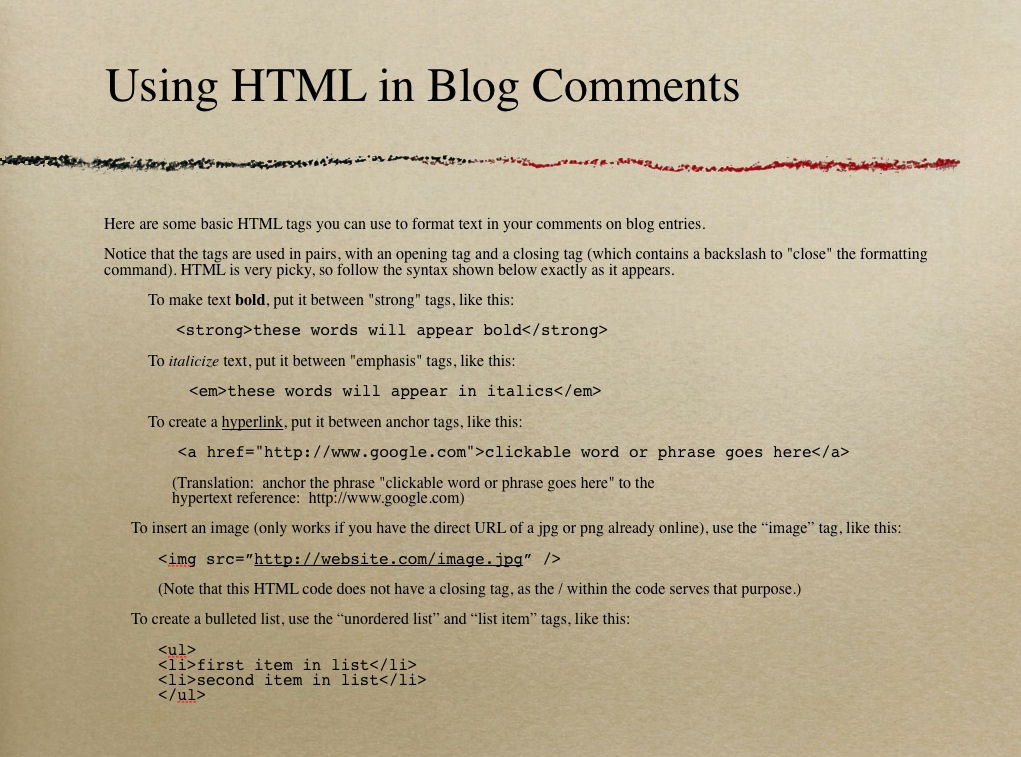
See this HTML Cheat Sheet for quick reference to simple codes you can use.
Move Widgets Up or Down
DELETE UNNECESSARY POSTS & PAGES
Don’t waste readers’ time by having items on your blog that readers will click on, only to discover that there’s no “there” there.
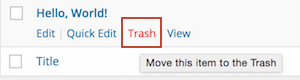
Go to the Posts section of the Dashboard. To delete the default “Hello, World” post that comes with all new blogs, hover over the post and click on the link to Trash that appears. Leaving that post on your blog is a sure sign of “blog newbie”!
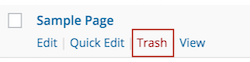
Go to the Pages section of the Dashboard, where you’ll see a default Sample Page. You can either delete it (by clicking trash) or customize it with your own content (by clicking edit).
ADJUST YOUR NOTIFICATION SETTINGS
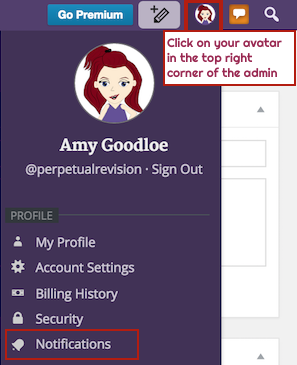
To access your notification settings (and other account settings), click on your avatar in the upper right corner of the admin bar.
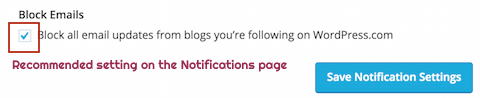
I highly recommend that you turn off email updates from blogs you follow, as you can always view recent posts in the Reader. You can also make other adjustments to what you receive by email.
CHANGE WHICH BLOG IS SET AS YOUR DEFAULT
If you have more than one blog associated with your WordPress.com account, one of those blogs is already set to be your “default” blog, which means it’s the blog you’ll see when you first log into WordPress.com To access your class blog, you’ll have to choose “Switch Site” to locate it and then click on its dashboard (or WP Admin) link.
If you want to change which blog is set as the default — or if you want to leave a blog you no longer participate in — here’s how:
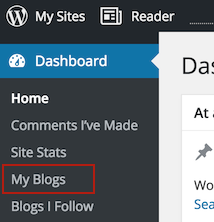
On your blog’s full dashboard, look under the top section of the sidebar for My Blogs, as shown below, and follow the link.
From the My Blogs interface, you can change which blog serves as your Primary, leave or hide blogs you no longer participate in, and adjust a few other settings as well, like enabling posting by email.
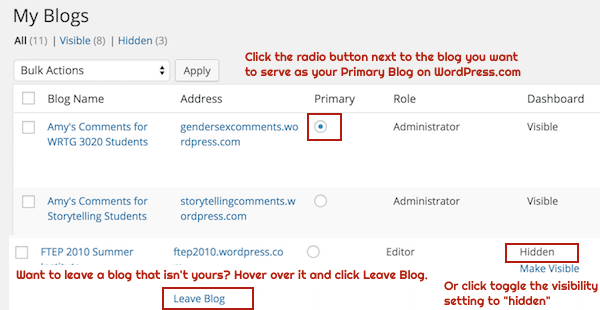
I use a web browser tool to post a copy of comments I leave on my WRTG 3020 students’ blogs to a central blog, so that’s why that blog is set as my primary blog.
ADD NEW USERS TO YOUR BLOG
You don’t need to add new users to your blog for my class, unless you want to add me as an Editor so that I can view your private journal posts, help you troubleshoot blog setup issues, and export a backup for you.

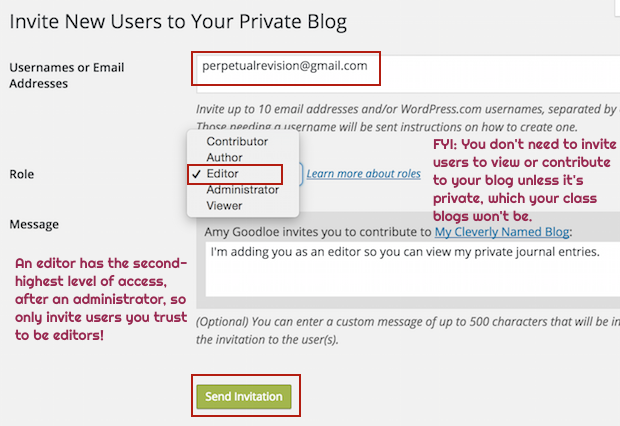
For more info on the different roles for users, see this WordPress help page: User Roles
STILL TO COME
– more details to come on working with blog headers
– how to customize the page background (with a color or image)
– how to insert a “logo” image
– how to troubleshoot themes that don’t work as you expected them to