If you make your audio essay in GarageBand, you will need to export it as an mp3 file before you can share it with the class (on the blog or Google Drive), or with anyone for that matter.
When you’re ready to share your recording, follow the steps below. These steps won’t change anything about your original recording, so you can always return to it and continue recording and/or editing.
Contents
WHY MP3 FORMAT?
When you record into GarageBand, you’re doing so at full quality. That makes for great sound, but it also results in files that are enormous, especially if you have more than a minute or so of audio. So that’s one reason why you should export into mp3 format: to create a compressed file that will be much smaller.
Here’s another reason: files created in GarageBand end in .band, and they should always stay in your GarageBand folder inside your Music folder. Chances are good that you’re the only one who would ever be able to open these files, since they’re native to your version of GarageBand and may contain material from your hard drive. So you can’t share your audio recordings with others by giving me a copy of your .band file. Instead, export an mp3 to share with others.
STEPS
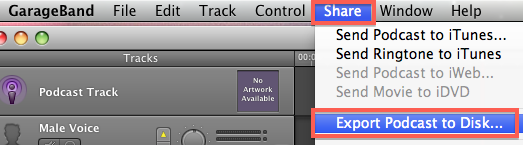
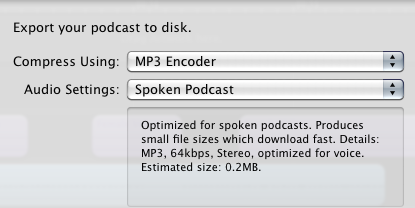
Choose MP3 and Spoken Podcast
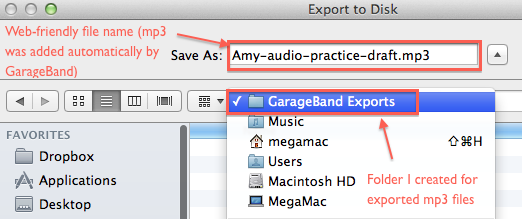
Name the Exported Version
Follow the file name format specified in the relevant calendar entry, which will typically start with your first name and some info about the assignment and version. For example: Mary-audiostory-draft
DO NOT put spaces in the file name or any form of punctuation other than hyphens. (That holds true for any file you plan to put on the web.) Also don’t manually type .mp3, as GarageBand will do that automatically. If you don’t see it, most likely you left the “hide extension” box checked at the bottom of the Save as box.
After you give the file a web-friendly name, choose a destination folder to save it in. Inside my Music folder, I created a folder titled Exports from GarageBand. As you can see below, that’s where my demo mp3 will be saved.
HOW TO FIND YOUR EXPORTED MP3
Switch to the Finder and browse for the mp3 file you just exported. It should be in the folder you indicated in the previous step. If you can’t find it, try searching with Spotlight using the file name you gave it.
Here’s what my demo export looks like in the folder I saved it to:
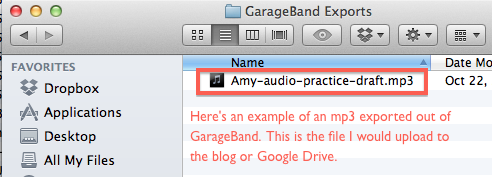
This is the version I would upload to Google Drive or the blog (or wherever). But before you do that, make sure you know how to find the file again when you’re using the blog’s media uploader or Google Drive’s file uploader.
If I had found the file below using Spotlight and wanted to know where it lives in my Mac’s Finder, I would right-click on the title of the folder the file is in, to see the full path, like this:

That way I’d know where to find the file when I wanted to upload it somewhere (or attach it to an email).
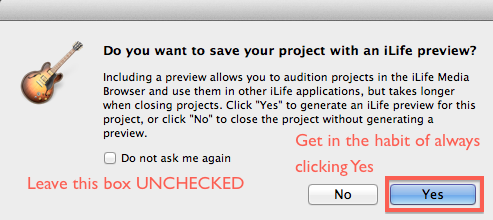
SAVE WITH iLIFE PREVIEW
Hopefully you saved the project throughout the process of working on it, but do so one last time before you close the project. When you do so the first time, GarageBand will give you the prompt below. Just trust me when I tell you that you should always say yes (and never check the box that makes this prompt go away for good).