
NOTE: This page is still under development, but you should find enough here to get you started with creating a comic in Pixton! The instructions refer to the student version of Pixton, which has most of the features of Pixton+.
TIP: Pixton has a tendency to time you out after a relatively short period, so SAVE YOUR WORK frequently!
SOUND EFFECTS brought to you by three Chihuahuas sleeping on my lap as I recorded the screencasts 🙂
Contents
GETTING STARTED: SCREENCAST
This video shows you what to do after you log into your student account, including how to find your comics, make a new comic, and use the interface (including settings and camera tools).
Making Comics in Pixton: Getting Started from Amy Goodloe on Vimeo.
GETTING STARTED: STEPS WITH SCREENSHOTS
After you log into the student account associated with my “Classroom,” you’ll see something similar to this:
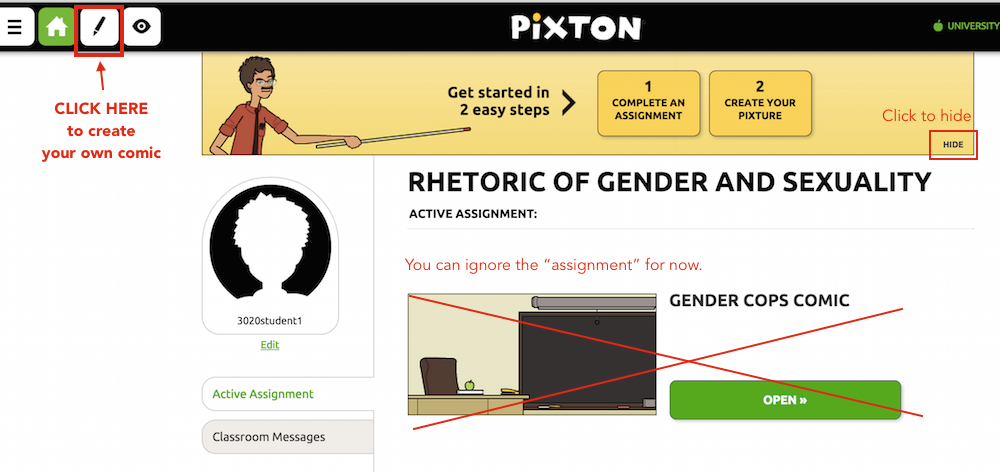
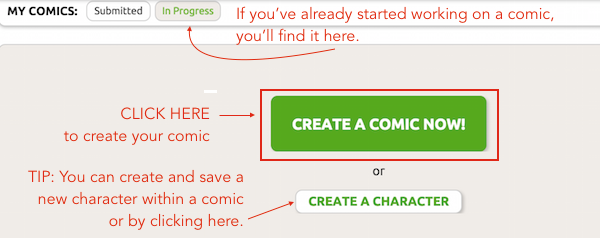
Creating a New Comic
To create your own comic, click on the My Comics icon (a pencil) in the upper left corner.
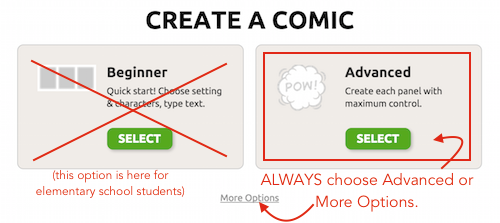
Click on the button for Advanced (or click on More Options). You’ll just be frustrated by the limitations if you start with Beginner Mode!
Understanding the Editing Modes
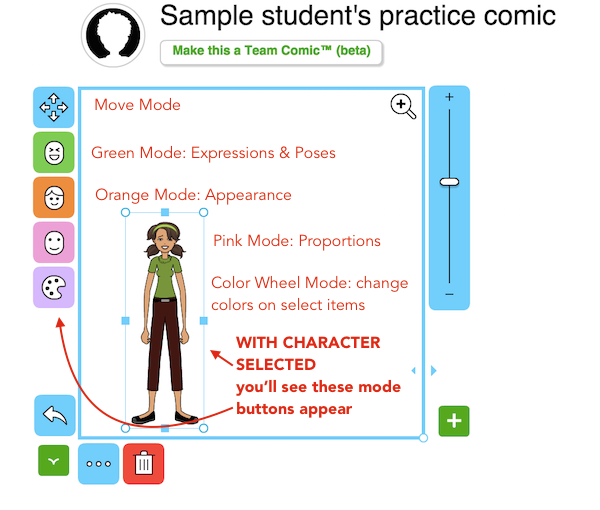
After you click the button to create a new comic, you’ll see an interface like the one below.
The notes on the screenshot introduce you to various aspects of the interface, including the MODE.
The YELLOW buttons along the left side mean you’re in YELLOW MODE, aka INSERT MODE. The color (and function) of the buttons will change when you’re in different modes. See the screenshots further down for more info on the other modes.
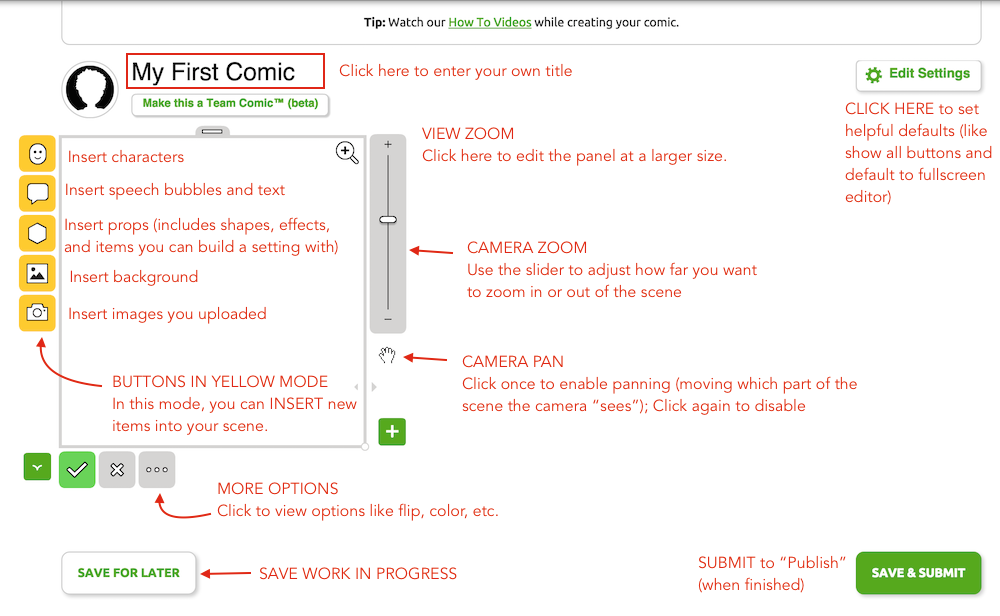
To activate these modes, you need to select a character in your panel. Other modes appear when you select a prop or background. If you haven’t selected anything, you’ll see yellow mode buttons.
CREATING CHARACTERS
This video shows you how to create your own custom character. You can adjust body size, shape, and proportions; select a shape for the face, eyes, nose, mouth, and ears; choose from a variety of shirts, pants, shoes, and accessories; and more. You can also choose from a variety of colors for most of these items.
Once you’ve adjusted the characters’ looks and proportions, you can save the character to use again in a new comic. When you bring the character in, you can change the facial expression and body position to suit the scene. But if you change anything about the character’s looks or proportions, you’ll be prompted to create a new character.
Making Comics in Pixton: Creating Characters from Amy Goodloe on Vimeo.
POSING CHARACTERS IN SCENES
This video shows you how to insert a custom character into a scene and then adjust the character’s body position, hand gestures, and facial expressions. Here are a few items you can adjust:
- which direction the character is facing (front, side, back)
- what their eyes are looking at
- the gesture each hand is making
- the placement of each separate body part (head, neck, upper arm, lower arm, chest, hips, thighs, calves, feet, etc.)
- the expressions conveyed by eyebrows, eyes, nose, and mouth
- the size of the character relative to the scene
You can also flip a character horizontally and move the character behind or in front of specific props (like behind a desk but in front of the desk chair). Once you’ve created a custom position or expression, you can save them for future use.
Pixton-posing-characters from Amy Goodloe on Vimeo.