
Contents
LOGGING IN
(1) Open this URL to open the student login page: https://www.pixton.com/schools/login
(You can get here from the Pixton.com home page, but it takes a few steps, so you might as well bookmark that login page)
(2) Enter the screen name and password I sent you by email.
CREATING A NEW PROJECT
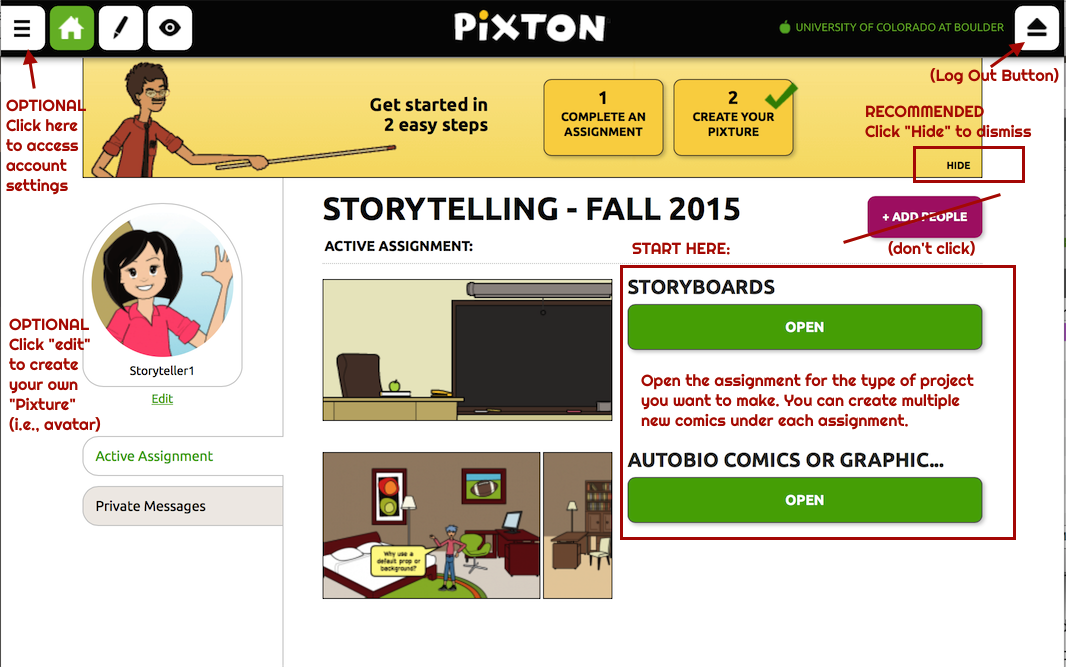
After you log in, you’ll see the home page for your “classroom,” which shows active assignments.
Here’s the “classroom home” for my Storytelling through New Media class, with a few parts of the interface labeled for you:
Choose an Assignment
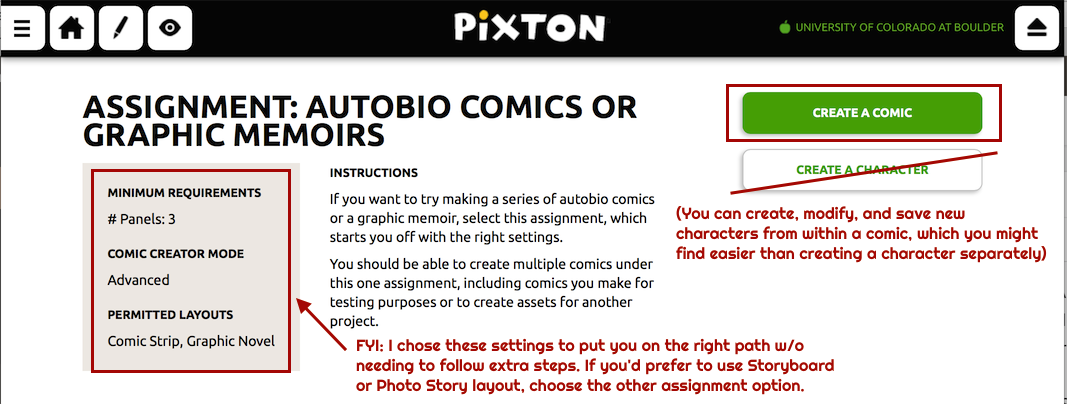
Choose whichever assignment seems appropriate for your purposes and click the GREEN “OPEN” BUTTON.
Create a Comic
Assignment pages provide details on the layouts available (and possibly a demo comic). Click on the GREEN “CREATE COMIC” BUTTON.
Here’s one of the assignment pages for my Storytelling class:
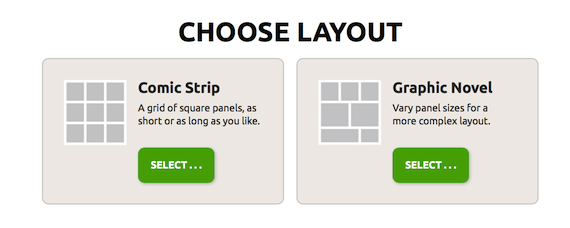
Choose a Layout
The layout options available to you will depend on what I set up for the assignment. Read the layout description for more info.
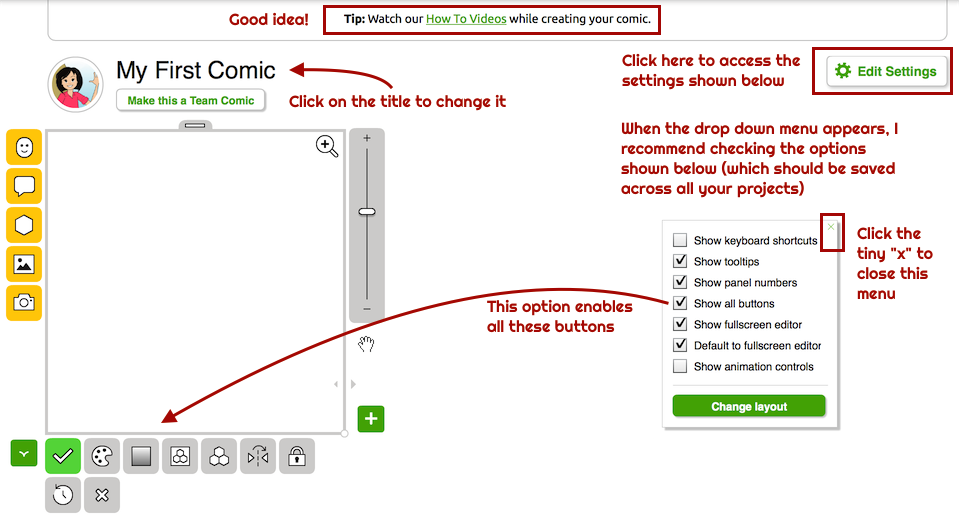
Set Up Your New Comic
Here’s an overview of the new comic interface, with some tips for getting started.
USING THE COMIC EDITOR
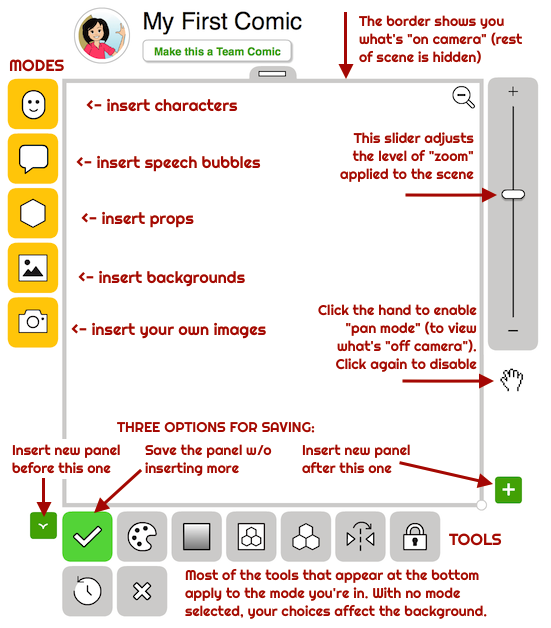
The Basic Tools
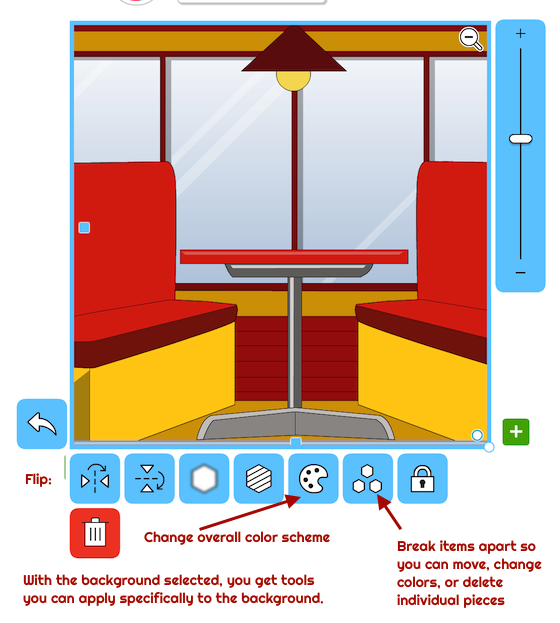
Choose a Background

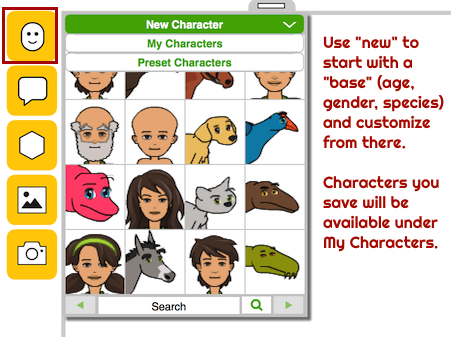
Choose a Character
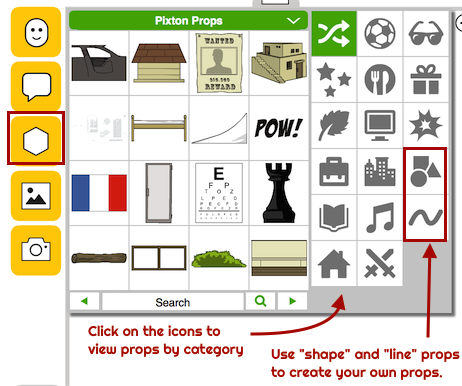
Choose Props
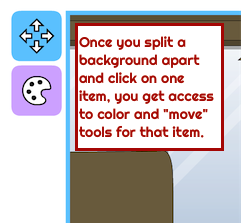
THE BACKGROUND MODES
Select the background to access the following options.
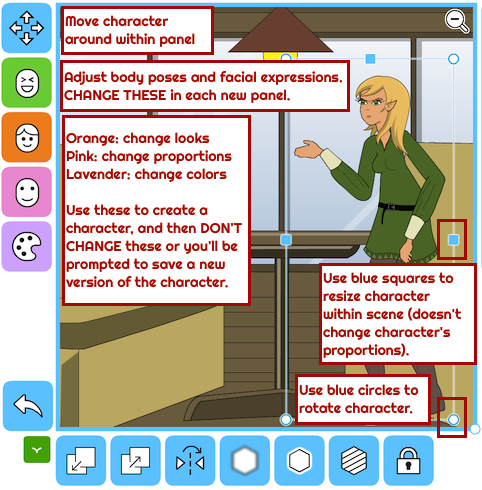
THE CHARACTER MODES
Select the character to access the following options.
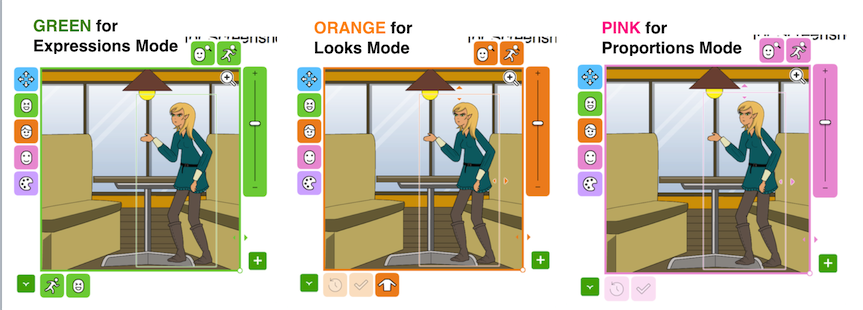
After you click on one of the modes on the left, the interface changes to match the color of the mode button. So always PAY ATTENTION TO THE COLOR of the interface to make sure you’re in the mode you intended to be.
Changing Character Expressions
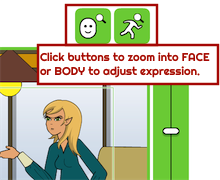
When in Expression (GREEN) mode, use the zoom buttons to make it easier to adjust expressions.
Then hover over the character to see which body parts you can move or rotate.
— Green parts with a hand = movable.
— Green parts with a circular arrow symbol = rotatable.
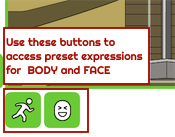
To try preset expressions for body or face, use the preset buttons:
(more to come on working characters)
GENERAL NAVIGATION TIPS
- If you get stuck in a mode you didn’t want, click outside the panel to deselect everything, which returns you to the default mode (with yellow buttons on the left).
- If your cursor seems to have grabbed an item to move around, tap or click again to make it let go.
SCREENCAST VIDEO TUTORIALS
I made these last year, so some steps might look a bit different. I’ll make updated versions if current students would find them helpful.
OTHER HELP RESOURCES
- Comprehensive guide to Pixton+ (made in the form of a Pixton “book”)
- Pixton’s YouTube channel
- Pixton tutorials made in the form of Pixton comics