If you make a PowerPoint presentation that contains a lot of images, the file might end up being quite large in size, particularly if the images you used were very large to begin with. (TIP: You can resize images in Preview on a Mac and in Paint on a Windows PC.)
If the file size is too large to upload to Google Docs or to send by email, try reducing the file size, following the steps below. These steps should work for PowerPoint 2007 and newer on a Mac or PC. (For older versions, use Google to search for how to reduce file size.)
(1) Check the presentation’s current file size. (See steps below.)
(2) Open the presentation in PowerPoint. (If you’re worried about losing any data, you might want to save a copy of the presentation and work on that instead of the original.)
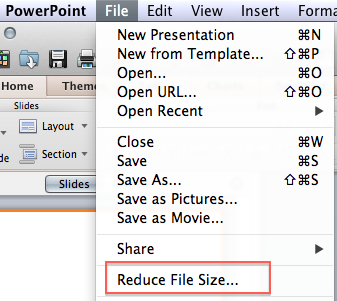
(3) From the File menu, select Reduce File Size.

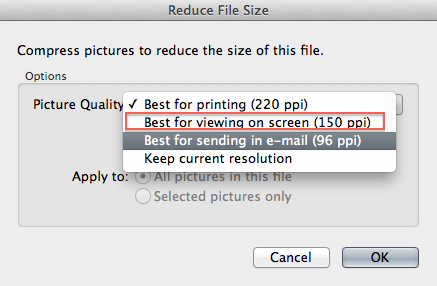
(4) From the options, choose “Best for viewing on screen.”

(5) Save the presentation and then check the file size again, to see how much it was reduced.
HOW TO CHECK FILE SIZE
If you’re not sure how to check the size of a file, follow these steps:
Windows Users:
Locate the file in the Windows Explorer and right click on it. Select Properties and take note of the file size there.
Mac users:
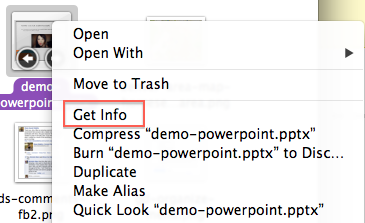
Locate the file in the Finder and right click on it (on a laptop, you can enact the right click options by holding down the Control key when you click). From the drop down menu that appears, select Get Info.

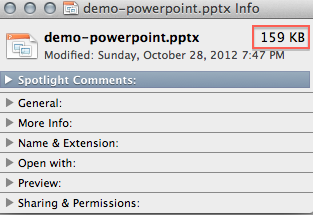
The file size appears at the top of the Get Info window, next to the file name.

ALTERNATIVE: Another way to check file size is to view your Finder window in list format rather than icon format. To switch the view, click on the List View button in the top portion of the Finder window.

