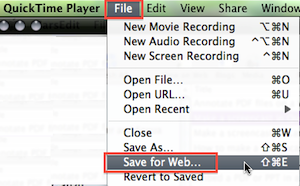
File Menu -> Save for Web
With a video open in QuickTime, go to the File menu and select Save for web.

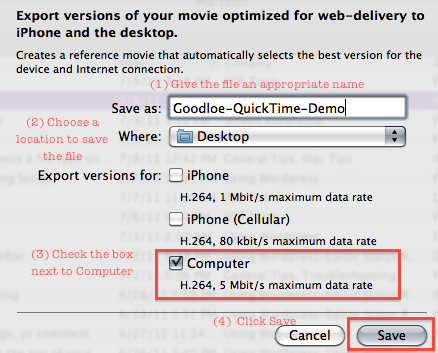
File Name & Destination
Give the file an appropriate name (something more helpful than ScreenRecording!), specify a location, choose “Computer,” and click Save.

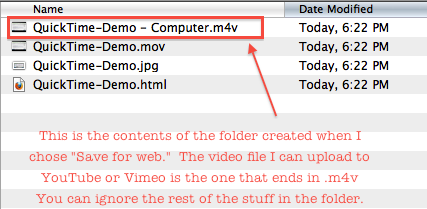
Finding the m4v Version
The version you create this way will appear in a folder in the location you specified. Open the folder and locate the file that ends in .m4v

The .m4v file is the compressed video file you should upload to YouTube or Vimeo. You can trash the other files as they’re of no use for our purposes.
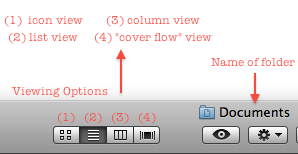
TIP: If your folder shows you only icons, then switch to “list view” by clicking on the list view icon as shown below.

