If you spot a problem with your blog post or simply want to add more material to it, you can easily open it again and edit it.
FRONT END ACCESS
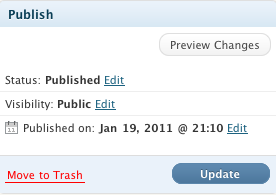
If you see something you want to fix after you publish the post and you still have the post editing interface open, just make the changes and then click the blue button again, which will now say Update.
If you’ve already closed the post editing interface, you can still edit your post. While viewing the post, click on the Edit Post link in the member menubar at the top, as shown here:

After you’ve finished editing the post, click the blue Update button to publish the revised version. (FYI: On the front end, your post will show both the original post date and the last updated date.)
DASHBOARD INTERFACE: QUICK EDITING MODE
For minor changes, like changing the category, adding tags, or changing from Draft to Published status, use the Quick Edit option.
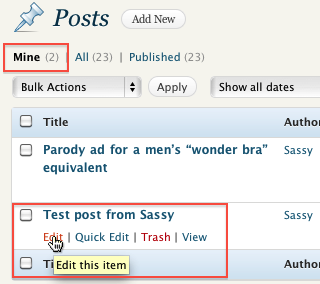
(1) Hover your cursor over the title of the post you want to edit and choose the “Quick Edit” link that appears below it.

(2) On the panel of Quick Link options, make the necessary changes. If you choose a new category, be sure to uncheck the old one.

(3) Click the blue “Update” button in the lower right corner.
DASHBOARD INTERFACE: FULL EDITING MODE
For more extensive changes, like editing the text of your post, fixing hyperlinks, adding or editing images, and so on, use the Full Editing option instead.
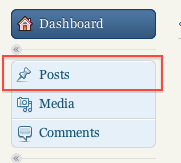
(1) Go to the blog’s Dashboard and click on the Posts tab from the Dashboard side menu.

A list of blog posts will appear. Depending on the option you selected last time you viewed the page, the list may contain only your blog posts or everyone’s blog posts. Click on “Mine” to show only your own posts.

(2) Locate the subject line for the post you want to edit and click on it.
(3) When the post editing page loads, make the necessary changes to the subject line, text, images, hyperlinks, categories, and/or tags, as needed. If you choose a new category, be sure to uncheck the old one.
(4) When you’re finished, either use the Preview option to double-check how your changes will appear or click the blue Update button and then follow the link at the top to see the revised version.

NOTE: WordPress saves your revision history, so if you make a mistake and want to recover an earlier version, look for the revisions section under the post editing box.
