
When OS 10.9 (Mavericks) was released, it came with a completely redesigned version of iMovie. I’m referring to it as iMovie ’13, but some users refer to it as iMovie 10 (as in version 10), so keep that in mind if you search for help on Google.
The tips on this page apply to that version, which is also what comes with 10.10 (Yosemite). If you have earlier versions of the Mac OS, see other handouts in the Using iMovie category. Also check out:
- Tuts+ tutorial on: How to Create a Movie From Start to Finish With iMovie ’13
- Apple’s iMovie ’13 Support Pages
Contents
GETTING STARTED
Set Preferences
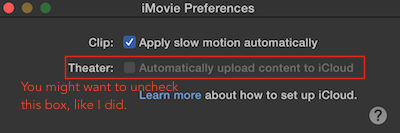
iMovie ’13 has very few preferences, as you can see below. If you don’t want your exported videos to also be synced with iCloud (which can take up a lot of bandwidth), uncheck that box.
Create a New Event
“Events” within iMovie are like folders you can use to store all the assets you’ll use to assemble your movie.

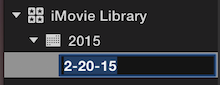
The date is the default title for new events
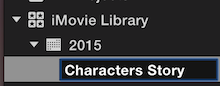
But you can change the title to something more helpful.
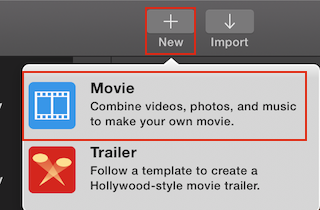
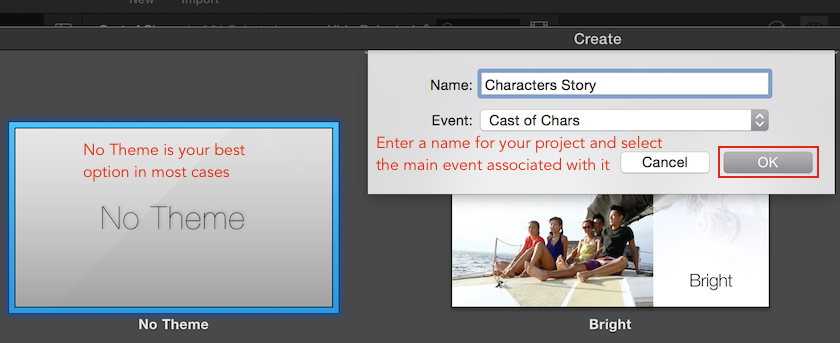
Create a New Project
“Projects” within iMovie are actual movies in progress, which you assemble from the assets in one or more Events.
WORKING WITH IMAGES
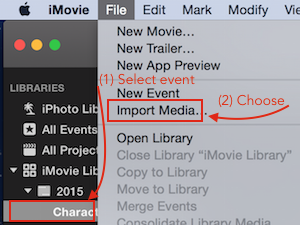
With your target event selected, you can import images from iPhoto or by dragging and dropping.
BUT PLEASE NOTE: Images are the ONLY type of media you can safely drag and drop into iMovie, as iMovie saves a copy of them. If you drag in other media, like audio files, then instead of saving a copy of those files, iMovie will rely on a relative link to the files on your hard drive. If you move or rename those files, iMovie will lose the connection to them and you’ll get a “media missing” message.
Importing from iPhoto
If your images are in iPhoto, click on iPhoto Library under Libraries in the upper left corner of the iMovie interface and insert them into your target Event.
See Apple’s help page: Add Photos and Video Clips from iPhoto or Aperture
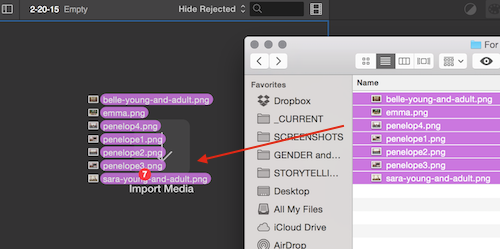
Importing through Drag and Drop
If the images aren’t in iPhoto, you can drag them in to your target Event like this:
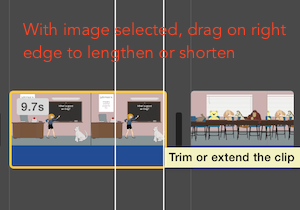
Adjusting Duration
WORKING WITH VIDEO CLIPS
In addition to importing video clips, as described below, you can also apply (or remove) the Ken Burns effect, apply stability control, adjust colors, strip the audio, and more.
For details, see Apple’s Help pages on Effects and Adjustments
Recording Live into iMovie
See Apple’s Help page: Record Video with Built-in FaceTime Camera
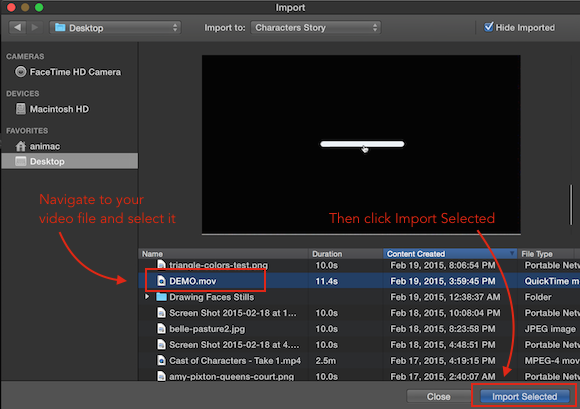
Importing Video Clips
You can also import video clips captured or recorded elsewhere into your Events folder, as long as they’re in a format iMovie can work with (like .mov, .mp4, or .m4v). If your clip is in another format, search Google for a free converter using a search phrase like this: free convert .wmv to .mov
Also see Apple’s help page: Importing Video
WORKING WITH AUDIO
If you’re using audio clips created outside of iMovie, follow the appropriate steps below to import these into your target Events folder. DO NOT drag and drop audio files into iMovie. Unlike dragged and dropped images, which iMovie will save a copy of, iMovie will rely on a relative link to the audio files on your hard drive. If you move or rename those files, iMovie will lose the connection to them and you’ll get a “media missing” message.
Start by selecting the source of your audio clips under the Content Library portion of the sidebar:
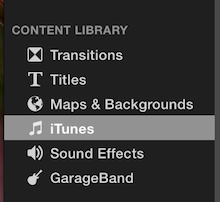
Importing from iTunes
From your iTunes library, you can select music files as well as voice memos and recordings you’ve imported into iTunes.
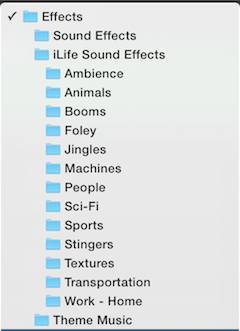
Accessing Sound Effects
From the Sound Effects library, you can choose from a variety of built-in (and freely re-usable) sounds. For short music clips, look under Jingles.
Importing from GarageBand
From the GarageBand library, you can import projects you’ve recorded in GarageBand and saved with an iLife preview.
Recording a Voiceover
The easiest way to get a voiceover recording into iMovie is to record it directly in an iMovie project. But you can’t record a voiceover that’s longer than the duration of the visuals in the project. So here’s a tip: if you haven’t yet adjusted the duration of your visuals, insert a title card and set its duration for as long as possible. That gives you more “space” for your voiceover recording.
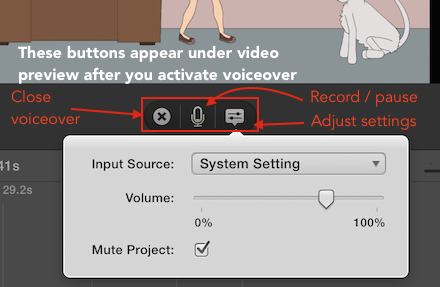
Activate the voiceover tool:

Use the voiceover controls:
For more on working with audio, see Apple’s help pages: Add Audio and Music and Adjusting Audio
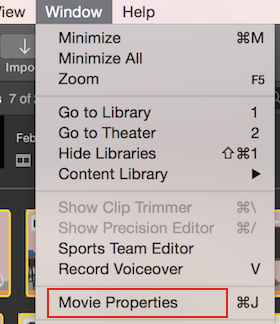
LOCATING VIDEO SETTINGS
If you don’t see a settings toolbar above the preview of your video, like this:
![]()
Here are two ways to activate that toolbar:
![]()
DON’T LET KEN BURNS DIRECT YOUR MOVIE!
How to Remove the Auto-Applied Ken Burns Effect
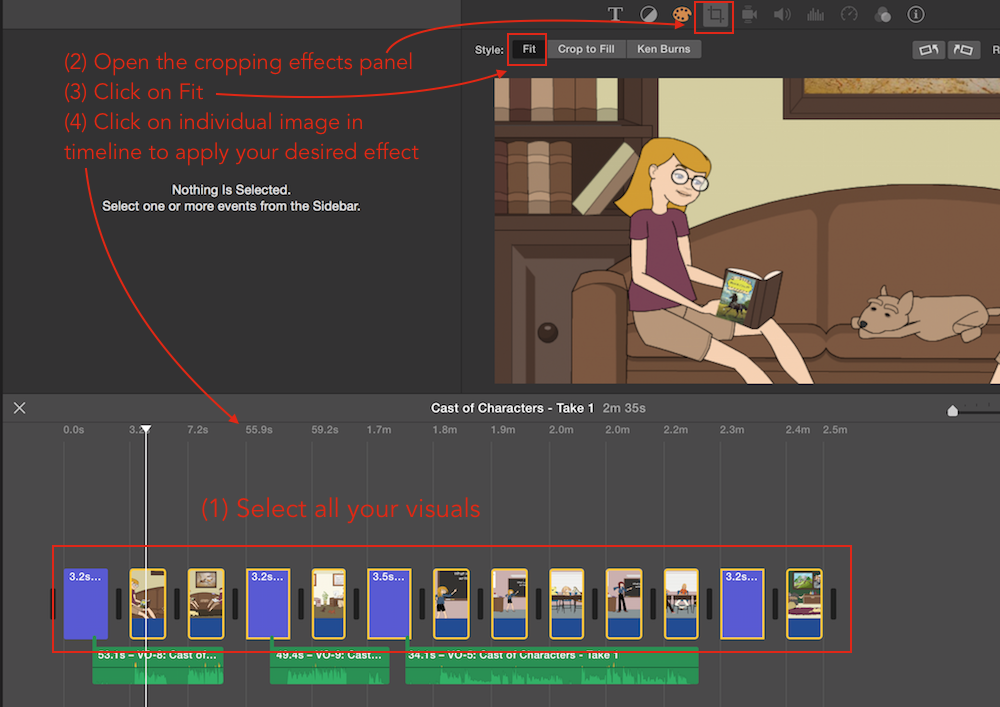
After you drag images into an iMovie timeline, you’ll discover that Ken Burns has taken over your movie project and applied his effect to every image. It’s time for YOU to take charge!
Here’s how: select all your images, click the Settings button in the upper right corner of the interface, click on the crop icon in the settings bar, and click on Fit. Then you can apply the Ken Burns effect only where you want it, how you want it.
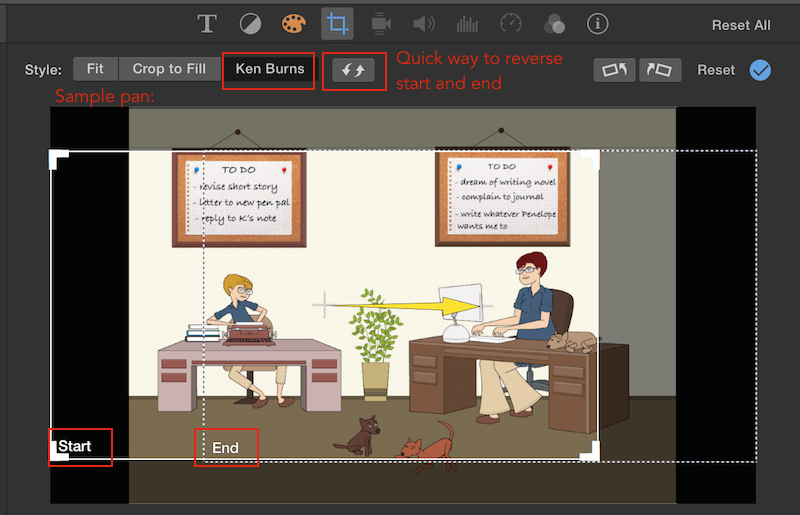
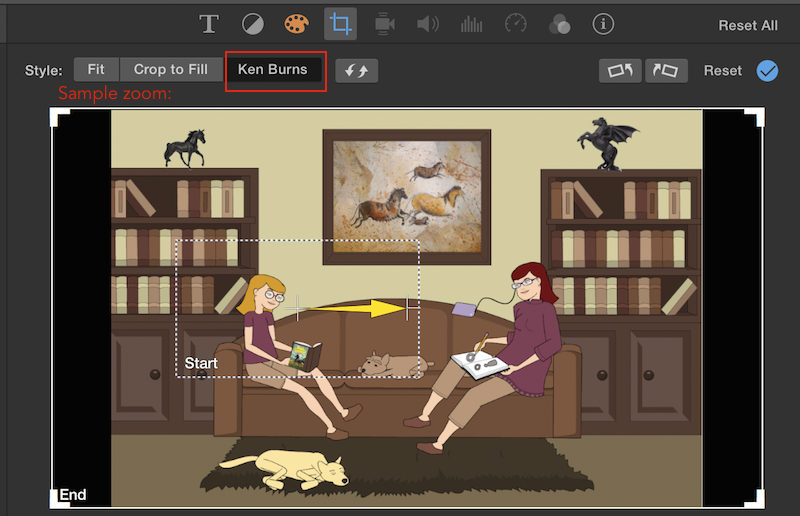
How to Apply the Ken Burns Effect Where YOU Want It
Camera Pan
This effect makes it appear as though the camera is panning across your image. The speed is based on the duration you set for your image.
Camera Zoom
This effect makes it appear as though the camera is zooming in or out of your image. Again, the speed is based on the duration.
ADDING & ADJUSTING TITLE CARDS
You can adjust the duration of title cards the same way you do for images: select the card (so it has a yellow border) and drag on the handle on the right.
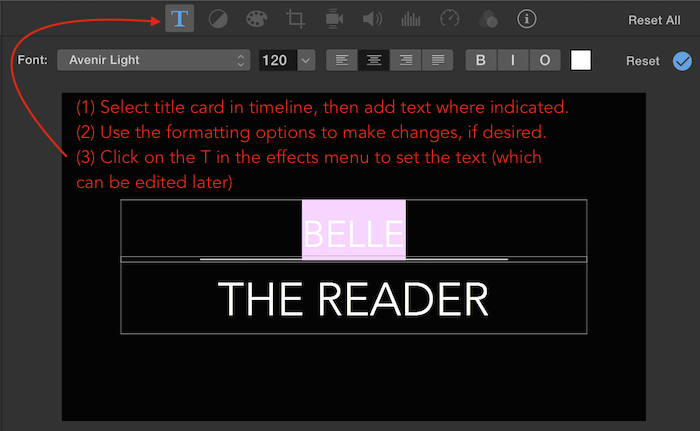
Also see Apple’s Help pages: Add and Modify Title Cards
EXPORTING A WEB-READY COPY
See this separate help page.