
If you have iMovie ’11 (which came with Mac OS 10.7 and 10.8), follow the steps below.
If you have iMovie ’13 (which came with Mac OS 10.9), follow these steps instead: Export a Web-Ready Video from iMovie ’13
The Short Version
The Long Version
Understanding Video Editors
iMovie is a non-linear video editing system, which means that it allows you to assemble video projects from a variety of media files on your computer, without making changes to the original files. For example, if you bring a photo into iMovie and crop or brighten it, that effect will apply only to the iMovie project, not to the original file.
Because this is how iMovie works, the iMovie project files on your computer can only be used on YOUR computer (or on an external HD that has all of your media files on it). So if you want to share an iMovie project with a friend, you wouldn’t send them the iMovie project file because that file doesn’t include all the associated media files.
That’s why iMovie, like most video editing programs, has an Export feature. When you export a project, you’re making a copy of it that compresses all the parts into one stand-alone video file that will play on the web (and most computers). The original project remains untouched, and you can continue working on it as much as you’d like. But when you’re ready to share another version, just export another web-ready copy.
Below you’ll find step-by-step instructions as well as a screencast on how to export a web-ready copy of your project in iMovie ’11.
Step-by-Step Instructions
Choose Share –> Export
Go to the Share menu and choose the Export option (the only one with a keyboard shortcut shown). DO NOT choose any of the other options, as they’ll just create hassles for you.

Choose Your Export Settings
Give your exported copy a helpful file name that has NO SPACES (just like any file you plan to share on the web). For example: miller-amazing-story-roughcut
Also specify where the exported file will be saved on your computer, like on the Desktop or in a folder you created for web-ready versions of your projects. DO NOT choose the iMovie system folders (Projects and Events), which are in the Movies folder. For that matter, don’t touch those folders at all!
Choose a Size
The size options shown on the export settings window refer to dimensions, but these size options will also impact file size (measured in MB).
- For test shots and rough cuts, choose “Medium.”
- For final cuts, choose “Large” or one of the HD options, if available.

Export
Click the Export button and give iMovie some time to compress your video. This process can take anywhere from 30 seconds to 10+ minutes, depending on the size of the original video and the number of different media clips it contains.
Once iMovie has completed the export process, you should be able to find the video file in location you chose for the export (such as your Desktop or a special folder).
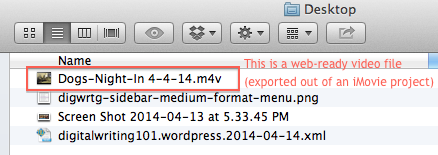
The file name should be what you entered earlier, and the file should end in .m4v This is the file you can share with others by uploading it to Google Drive or a video hosting site.
For example, here’s a file I exported out of iMovie:
Screencast Instructions
The screencast below is part 4 of a series on how to create a CDS-Style digital story using iMovie ’11, but you might find it helpful even if you’re working on another type of project in iMovie.
In this screencast you’ll learn how to export a version of your digital story that you can share with others via Google Docs or a hosting site like YouTube or Vimeo (which is what will allow you to embed your project on the class blog).