
PDFs: Just about any document on your computer, including web pages, can be converted to PDF format so you can share it with others on the web. See: HOW TO “Print” to PDF
Follow these steps to insert an image into your blog post or to attach a PDF (the PDF will be available to viewers who follow a link).
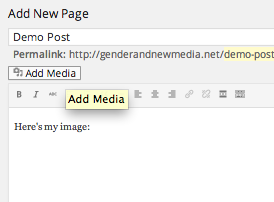
(1) In the blog post editing window, place your cursor where you want the image or link to the PDF to go. If it’s an image, I recommend pressing return to move the cursor to a new line.
(2) Click the Add Media button.
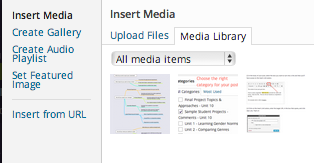
(3) Click on the Upload Files tab to the left of the Media Library tab. Use the drag and drop interface to upload your image or PDF file.
(4) Images Only: Choose the appropriate attachment settings:
- Images wider than 600 pixels will cover the sidebar on the blog.
- The alignment options “center” and “none” are your best bets.
- For “link to,” choose either “media file” or “none.”
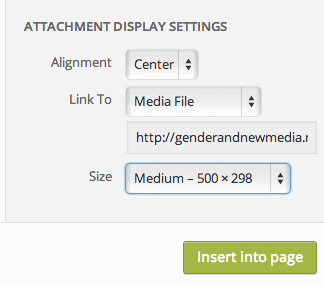
(5) Click the “Insert into Post” button.
(6) You should now see the image inserted into your post editing window or a link to the attached file.
WANT MORE DETAILS?
For a MUCH more detailed guide to all the options, see the WordPress.org help page on: Inserting Images into Posts