While you’re working on a project in Movie Maker, you should periodically choose Save from the File menu to save your project file. But when you’re ready to share your movie with others, keep in mind that you can’t actually share this project file. This is your original project file that works only in your copy of Movie Maker.
To make a movie you can share with others, you need to have Movie Maker export it and compress it into a format you can send over the internet. Unfortunately, Microsoft didn’t use what would’ve been the obvious word, Export, to help you recognize how to do this. Instead, Microsoft calls it “Make a movie file.”
Here are the steps you should follow after you’re finished editing your project file and are ready to share it with others. (Save the project file first, so you don’t lose your most recent edits.)
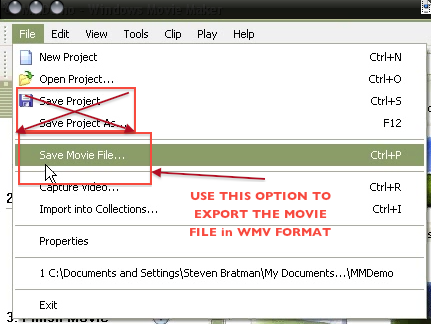
(1) Go to the File menu and choose Save Movie File.
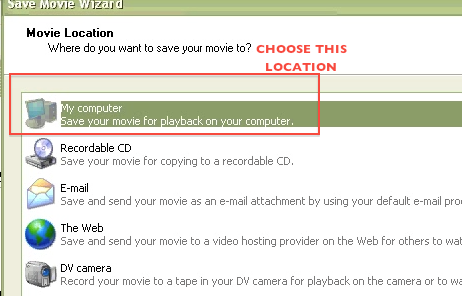
(2) Choose the “My Computer” option for the location of your movie.
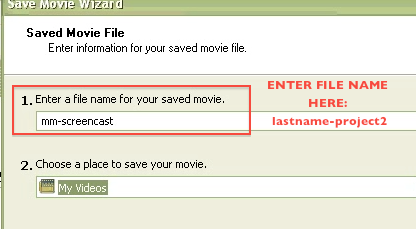
(3) Enter the appropriate file name for your movie, which should be something like: lastname-project2
NOTE: Do not put any spaces or punctuation marks, other than hyphens or underscores, in your file name, or you won’t be able to upload it!
You can also specify the spot on your hard drive where you want Movie Maker to save your movie file.
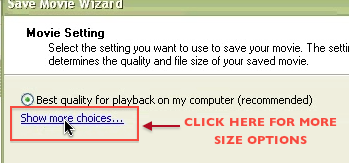
(4) Click the Show more choices link.
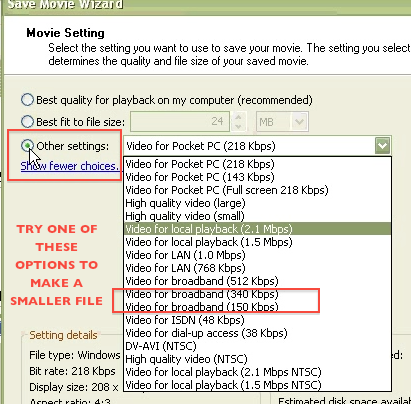
(5) Choose the Other Settings button and then select a fairly small file size so that the movie isn’t enormous. See the options below:
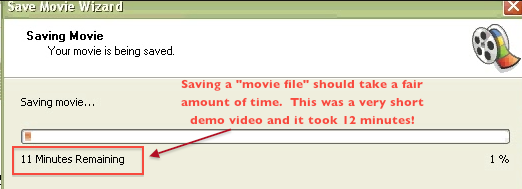
(6) Movie Maker will take a few minutes (or maybe more than a few) to compress the exported movie. NOTE: If Movie Maker saves your file instantly, you did NOT export it correctly! It should take some time to compress the file.
(7) After it’s finished, you can find the movie file in the location you specified earlier. Double click on the file and it should open in Windows Media Player.
The file should also have the extension .wmv, although you may not see this if you have your computer set to hide extensions. (I recommend against doing that because then you can’t tell which files have which extensions, and you need to know this before you post a file on the internet.)
(8) You can now upload your .wmv file to Google Docs or YouTube or wherever you’d like to share it with others.
